By Lucy Bunce
Friday, 21 March 2014
Cherry Blossom Inspired Nails
Spring is just around the corner (thank goodness!), so I decided that I would show you how to do a spring style mani. So here it is, a quick and easy Cherry Blossom design.
Tuesday, 28 January 2014
Review - Barry M, The Royal Textured Glitter Collection
Make up brand Barry M has always been at the forefront of innovation
when it comes to nail polish. Constantly releasing new and exciting products
way before, and for a fraction of the price, of other brands, they are
definitely a nail polish addict’s best friend.

And one of these newest products is their ‘The Royal Textured
Glitter Collection’ (not to be confused with their textured nail polish).
Available in five shades (Pink Princess, Gold Majesty, Nude Duchess, White Lady
and Purple Countess) the brands website (www.barrym.com)
describes these products as ‘… will make you feel like a glittering, glistening
Princess’ that ‘…will get your nails noticed in an instant.’ And my goodness
they were not lying.
This is an amazing statement nail polish. When I first saw pictures
of what it looked like on the nails, I was sure that it must have been applied
over a coloured base coat, like you would have to with a normal glitter polish.
But you don’t, as unlike other glitter products, this consists of thousands of
teeny, tiny particles that work together to create a solid glitter colour. One
coat will give you enough coverage to look good, but with two coats it gives
and amazing solid, coloured glitter look.
What Pink Princess looks like with two coats
What’s better is that, as with most Barry M products, the formula of
this is amazing; it goes on smoothly without smudging, as it isn’t too thick.
It also dries really quickly, so if you are after a super fast, statement
polish this is definitely for you. I have Pink Princess and White Lady, and
they are the epitome of girly, feminine chic, and would be perfect for a
wedding or party, especially as it is quite hard wearing and takes a lot of
wear and tear to chip.
As with any polish, it has its’ downsides. As the name suggests it
is a textured polish, so it has a rough gritty texture, which can still be felt
even under a topcoat. I don’t have a problem with textured polish, but I know
some people do, and if you don’t like polish that feels gritty, then this
definitely isn’t for you.
The only real downside that I found with this product was when I
tried to remove it. It was a long process that took me 20 minutes to do, so it certainly
can’t be removed in a hurry. Also, if you try to use a cotton pad with polish
remover on, you are just going to snag the pad and end up with cotton covered
fingers. The best thing to do is buy some nail polish remover pads, and hold it
on each nail for about thirty seconds before beginning to remove. Just make
sure you have a few pads, as you will probably go through about three or four.
This is the only downside I found with this product, but trust me it’s
not that bad, because once this polish is on, you are never going to want to
remove it.
Friday, 13 September 2013
Katy Perry 'Roar' Inspired Tiger Nails
Here at Love Nail Art Forever, I am a huge fan of Katy Perry. So when she released her ultra catchy song Roar, it was the perfect inspiration I needed to create a tiger inspired manicure. So here it is, I hope you like this manicure, and keep looking back for more.
By Lucy Bunce
Wednesday, 24 July 2013
How To - Fruit nails
There is nothing better in the summer sunshine than eating fresh summer fruits. Well now you can have the look of summer fruits on your nails in my step-by-step guide to fruity nails. In this I will show you how to do both strawberry and watermelon nails.


Start by painting your nails with a base coat, to protect the nails from staining. Next paint the nails with two coats of a red polish. I used Maybelline color show in Power Red. I only did an accent nail for this design, but you can do as many nails as you wish.

Next, take a green striper and create a zig-zag pattern across the top of the nail. To make sure that I got the shape that I wanted, I drew the outline on my nail with a white nail art pen, and then went over this line with the striper. Fill in the top section of the nail with two coats of green polish applied with the striper.

Finally, take a white striper or nail art pen and draw small lines or dots onto your nail. When these have dried, go over them with a yellow colour. Doing this will help the yellow to stand out much more on the red background. Finish your design with a top coat to blend all the layers together and you are done!
Next, how to do watermelon nails.

Start by applying a base coat to protect your nail. Next cut two pieces of masking tape into thin strips, and apply them to your nail so that you create a small triangle shape. You only want to apply these to a small section of the nail, as you only want to create a basic triangle shape.

Apply one or two coats of red polish, I used the same Maybelline polish as before. Whilst the polish is still a little tacky, carefully remove the tape.

You should be left with something that looks like this.

Apply a white line of polish to the bottom of your nail. Do this slowly to get the most even line. Don't panic if the line isn't straight, you can go back and fix this later. I used L.A colors color craze nail polish in Energy Source.

Once the white is dry, go over this with a line of green, leaving a small gap of white poking out of the top. I used L.A colors color craze nail polish in Palm Tree. Once the green is dry, if you are not happy with the white line, go back over it with a white striper, as this will give you more control and a neater line.
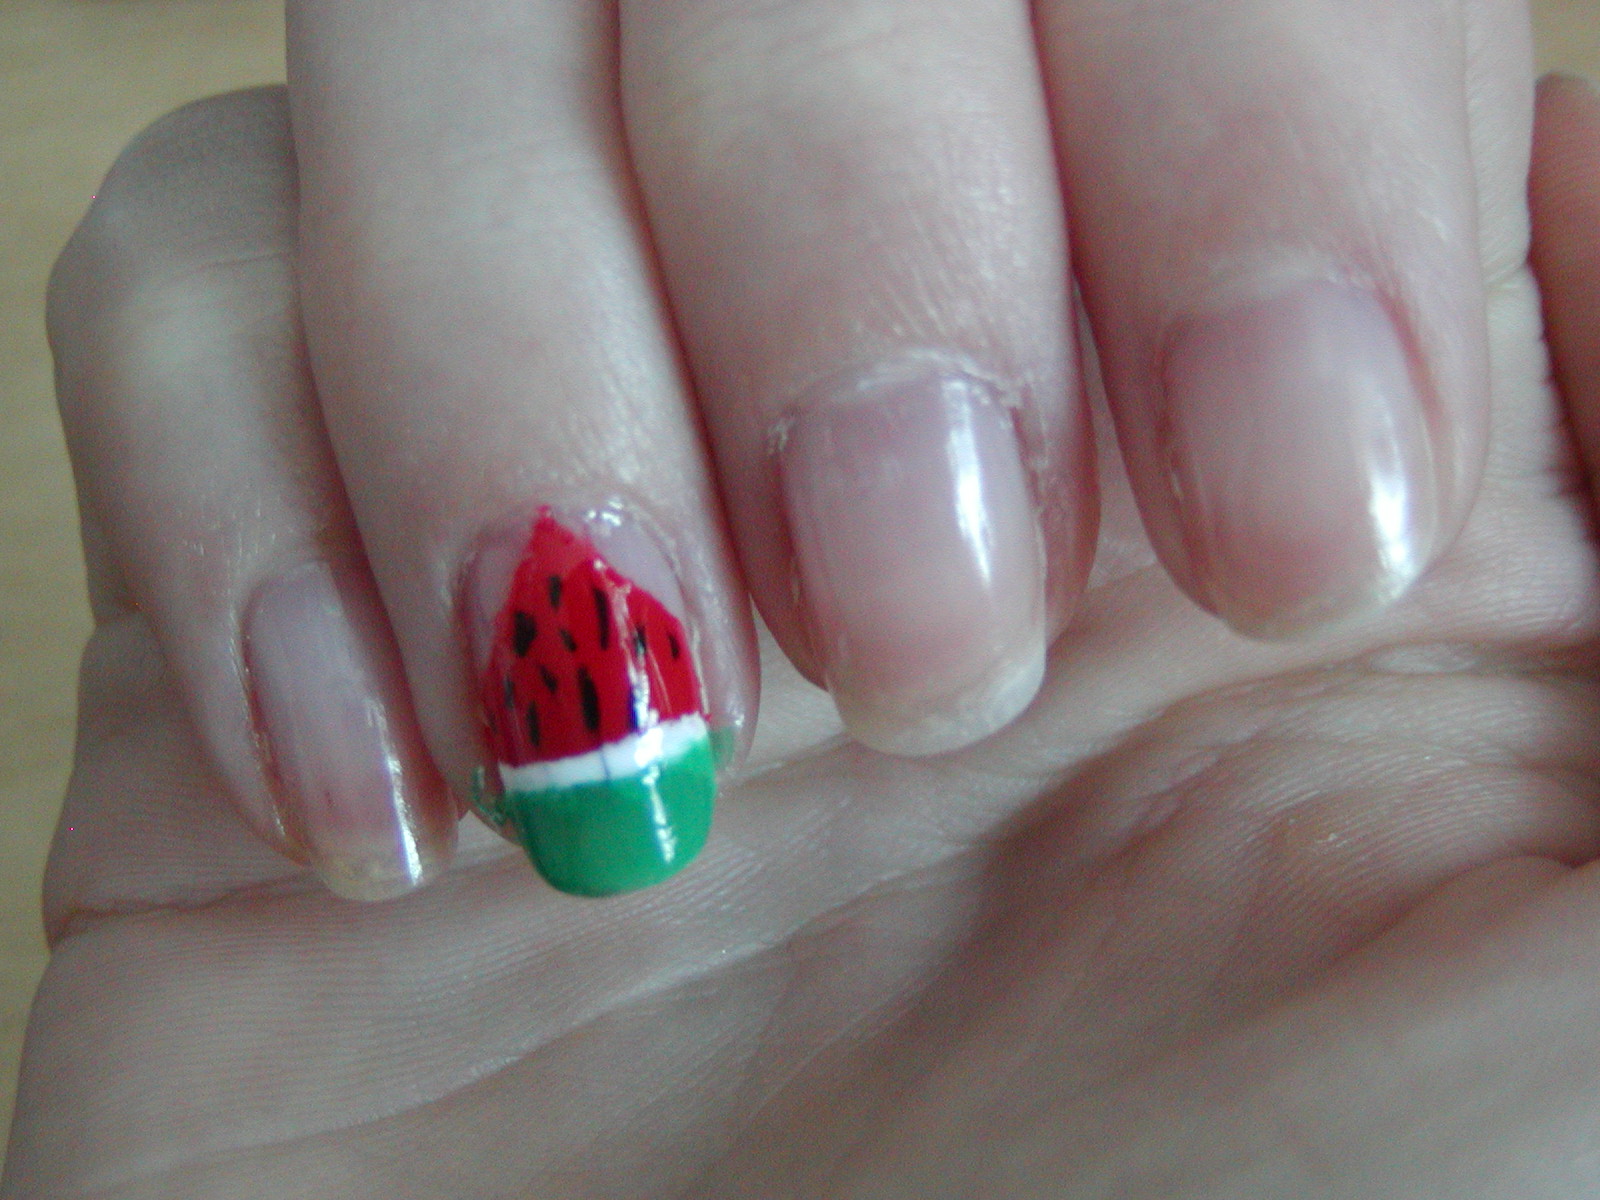
Using a striper or a dotting tool, draw on black lines to create the watermelon seeds. Finish with a top coat to protect your design, and help blend all the layers together.
And that's how easy it is to create fruit effect nails that look good enough to eat.
By Lucy Bunce
Wednesday, 17 July 2013
How to - French tips with a difference - Pretty pastels
Nothing says girly and elegant more than the classic French tip nail design. But sometimes this design can seem quite plain, so today I will be showing you how to do a different take on the classic design using pretty pastel colours, in step-by-step photos.


Start by painting your nails in a base coat to help the nail polish to stick. Then cut masking tape into small strips and use these to tape off the bottom of your nails. You can use French tips, but I find using masking tape easier.

Using any pastel colour that you want, paint the bottom of your nails. I couldn't decide between pink or blue, so I did alternating nails. I used Maybelline Color show polishes in Cool Blue and Pink Boom.

Whilst your nail varnish is still a little tacky, gently and carefully remove the tape. If you are left with a little ridge where the polish met the tape, you can very gently tap this down to make it less noticeable.

Using a nail striping brush, chose the same colour polish but in a darker shade, to create vertical lines down the tips.

Do the same on the other nails. My striper brush was actually a very similar colour to my base colour, so I wiped off the excess varnish and dipped it into a dark pink polish that I had to make these lines more noticeable.

Finish off with a top coat to blend all the layers together and to help your design last longer.
And there you have it, an easy and different take on the classic French Tip. You could use any colour that you wanted with this design, as long as you used a pastel for the base and a darker colour for the lines. I hope you enjoyed this step-by-step guide, let me know what you think of it via twitter, my profile is linked in my name down below.
By Lucy Bunce
Monday, 8 July 2013
How to - Monsters Inc Nails
With Monsters University being released on July 12th, it looks like our 2 favourite Monsters are set to take over the world once more. So I decided to show you an easy step-by-step guide on how to do Sully and Mike inspired nails.


Start off with a base coat to help the nail polish stick and to protect your nails. Then paint all of your nails except for your ring finger in a turquoise polish. I used Barry M Gelly Hi-Shine nail paint in Greenberry.
 Next paint your ring finger in a green colour. I used L.A Colours color craze nail polish in Palm Tree, but as this was too dark of a green I mixed it with a little white to make it lighter. (I know this polish looks the same as the others but that's just the way the flash made it look)
 Next use a light purple nail polish to create Sully's spots. I used an old nail polish CoverGirl Nailslicks in Tornado. You can either paint the polish on using the brush provided, or for a more precise option, use a large dotting tool. Be aware that if you use a dotting tool, depending on how thick the polish is applied, it could take a while to dry.
 For Mike's face, use a white nail art pen to draw a large circle onto the nail, and then colour it in. To make it a little neater looking, use a black nail art pen to draw a neat line around the eye. I used Barry M nail art pens. You could also use a large dotting tool with white polish and outline it with a striper if you don't have nail art pens.
 Use a smaller dotting tool, and add a splodge of blue or green polish for his Iris. (Mike actually has green eyes, but I put blue polish on before I realised what colour they were)
 Use the nail art pen to draw a small circle for the pupil. Draw a smile in any shape you want and use the white nail art pen to dot teeth along the top and bottom of his mouth.
 Add a top coat to the design to help blend all the different layers together and to help protect the polish, and you are done.
By Lucy Bunce


And there you have it, an easy and fun Monsters Inc nail art design. For an added wow factor, you could put some fur effect dust onto Sully's spots. Makeup Academy Fuzzy Fluff Fur-Effect nails would be great for this.
By Lucy Bunce
Friday, 28 June 2013
Maybelline color show nail polish review
Every week, it seems that a new type of
nail polish product is being created, each one claiming to be bigger and better
than the last ‘new thing’. The latest company doing this is Maybelline, with
their new color show nail polish. The product claims to be a new gel based
formula, with colour popping pigments that gives you bold, crisp, chip
resistant colour.
The reason that I first tried these nail
polishes is because I absolutely loved the MNY my varnish nail polishes that
Maybelline used to do, and I was disappointed when I couldn’t find it anymore.
But with all its bold claims, I thought I would give their new product a try.

A selection of the different colours, taken from the Maybelline website
But do all these claims really hold any
truth? Well I have to be honest, these nail polishes are both brilliant, but
bad at the same time. I own six different colours, and the darker colours,
Urban Turquoise and Power Red, are some of the best nail polishes I have ever
used. They go on amazingly well, giving really bold intense colour even with
just one coat, but with two your nails stand out so much.
Watery Waste, a silver colour, doesn’t give
quite as much of a bold colour as the darker ones in just one coat, but that’s
obviously a given. And then we come to the lighter colours, Cool Blue, Pink
Boom and Winter Baby. I cannot believe how different these colours can be from
the darker ones. When I tired to apply this to my nails without any base coat,
the polish just seemed to slip from my nails and fall and sit in the sides of
my nail, which is not a good look. However with a base coat applied the colour
does seem to redeem itself, and be almost as good as the darker colours.
However, Winter Baby, in my opinion, is a
compete waste of money. I just can’t seem to get on with this nail varnish. To
get any kind of colour from it you have two options, put on a thicker layer and
wait ages for it to try and dry, or put on thinner coats and have to put on at
least three for it to make any kind of impact, and doing this takes a long
time.
Because I work as a cleaner my hands and
nails take more of a beating day to day than other people’s hands would, so I
found that the claims it was chip resistant weren’t strictly true, but it does
last a lot longer than most polishes I have used.
So all in all, this nail polish offers
mixed results, with the darker colours being amazing bold and easy to apply,
and lighter colours being more subdued and a little trickier to apply. But for
only £2.99, which is amazingly cheap compared to some other companies out
there, it is a good nail polish.
By Lucy Bunce
Subscribe to:
Posts (Atom)